Manual Allocations
Before allocation, a customer and item should must be entered:
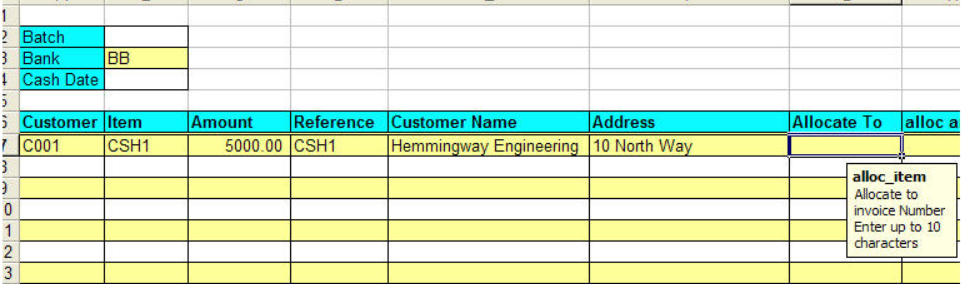
Right click in the allocate_to range, select Allocate.
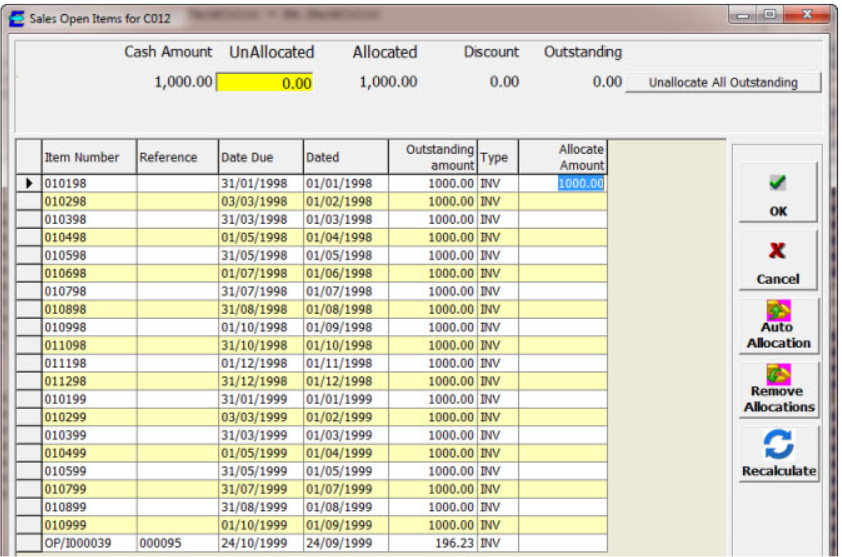
The screen below is displayed listing open sales items for the customer.
- Note that the Unallocated amount can only be entered if the Unallocated amount range is included on your spreadsheet.
- Clicking on an item allocates the outstanding amount.
- The Delete key will remove the allocation
- The allocated and unallocate amounts are shown at the top of the screen. If user over-allocate, then the unallocated amount will be red
- User can remove the allocations selected by clicking Remove Allocations
- Clicking on a column header will reorder the data by that column (click twice to reverse that order)
- User can select which items are displayed on the list (see Options).
- Clicking on "Allocate All Outstanding" sets the unallocated amount to the outstanding amount.
- Clicking OK will return the allocations to the spreadsheet.
When user first display the Allocate screen, any valid allocations already entered on the spreadsheet will be included on the screen.
User can select which items are displayed on the list (see Options).
Clicking OK will return the allocations to the spreadsheet.