Designing Templates
In addition to the standard templates, Excelerator allows easy and flexible creation of your own templates.
These can be empty templates for data entry, or existing spreadsheets with data can be used.
Excelerator works by taking or putting data into designated areas on a spreadsheet and these areas are called ranges.
There is a fixed list or ranges for every Excelerator module. Some ranges are mandatory, and must be created for Excelerator to work, others are optional.
Header Ranges
These are for where there is only one item of data per post e.g Journal numbers, and can only be a single cell.
Detail Ranges
For multiple lines of data e.g Nominal Codes and values. These should be columns of data of the same number of rows
Header/Detail Ranges
Data that can be both header or detail. For example, Purchase Invoice Excelerator allows a single sheet to be either one invoice, or multiple invoices.
Supplier code and invoice numbers can be header for the former, and detail for the latter.
Designing Templates
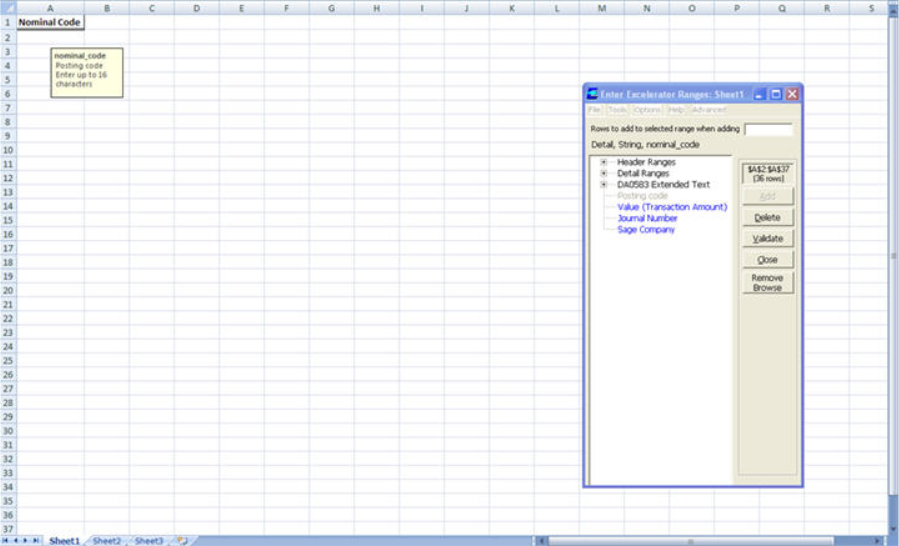
Open Excel, and select Excelerator > Admin. User will see the ranges that can be added into the sheet.
The red ranges are mandatory. The blue ranges are optional.
Select the Excel cell where user want the first range to start. In the above example, this is A2.
Then, in the Excelerator Admin window, select the range and enter the number of rows to add in the field at the top.
In our example, we have selected nominal_code and have assigned it 10 rows.
Click Add. User will see a confirmation that the range has been added from cell A2 to A11, and that the range heading has been automatically added in the cell above where the range starts, A1.
Also, the colour of the range name in the Admin window has changed from red to grey, indicating that it is an added range.
More ranges can be added in a similar way. In our example, we have selected the B2 cell and then added value up to B11.
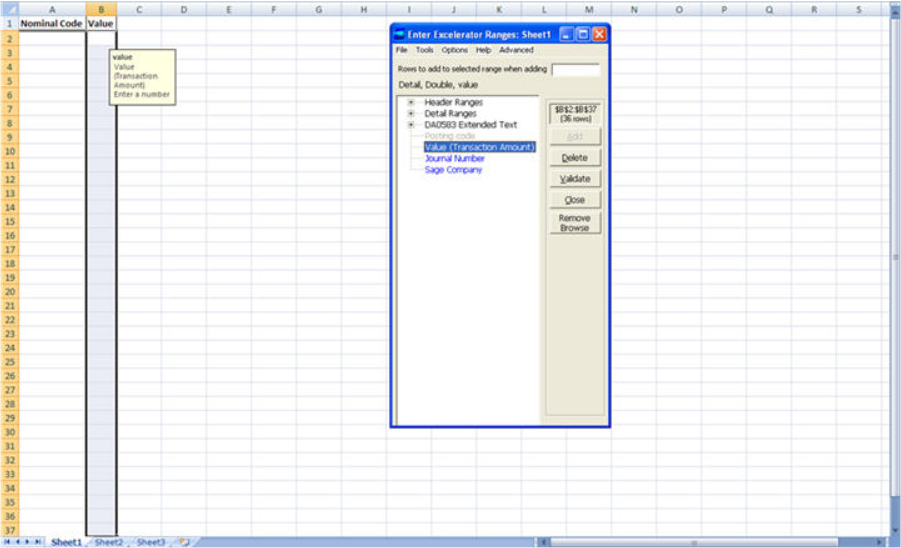
Since the Project Ledger is not being used in our example, the mandatory ranges that are required are now all present on the sheet, and it should be ready to use.
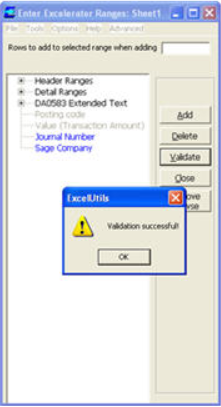
Click Validate to check that this is the case. If the validation is successful, click OK.
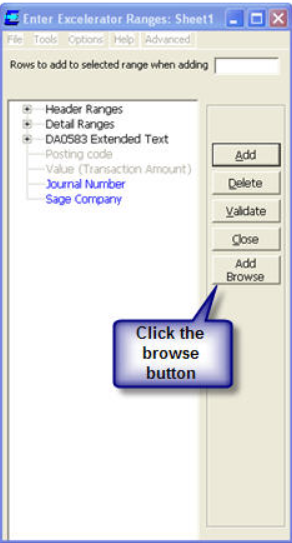
Then, click Add Browse to enable browsing on the Nominal Code fields. The button should rename to Remove Browse if the browse has been enabled.
Finally, click Close.
The template has now been created, and user can save it like any other Excel file.
Adding Browse
Then, click Add Browse to enable browsing on the Nominal Code fields. The button should rename to Remove Browse if the browse has been enabled.
Finally, click Close.
The template has now been created, and user can save it like any other Excel file.
On the sheet, right-click cell A2 and select Browse Records.
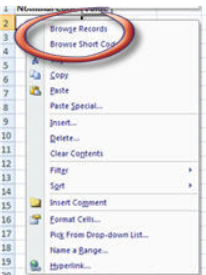
A window will appear displaying all the Posting Codes in the company that has been connected to.
Select the relevant code, and then click Ok.
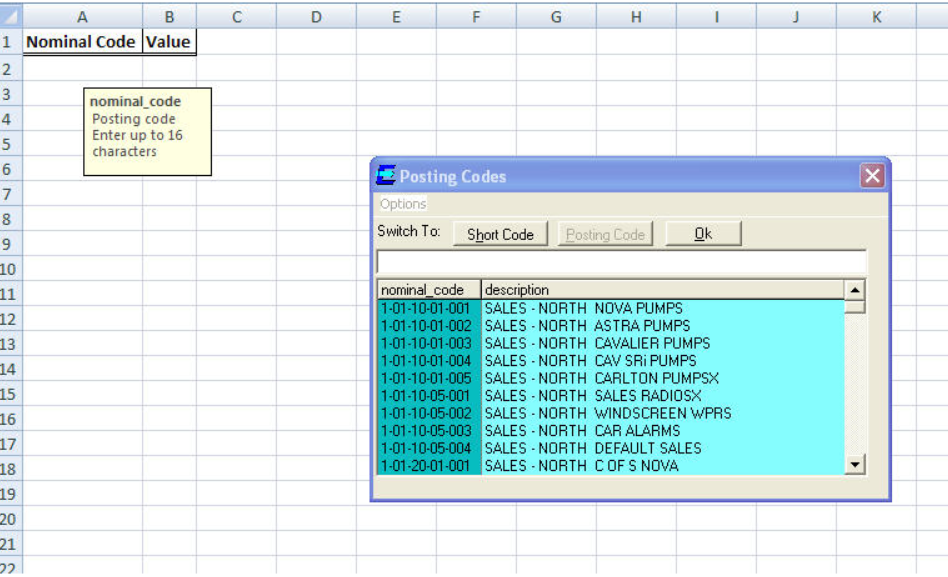
Type in a value in cell B2 to be the transaction amount.
Browse on and select another Posting Code in cell A3 and enter a negative amount in cell B3 to balance the journal.
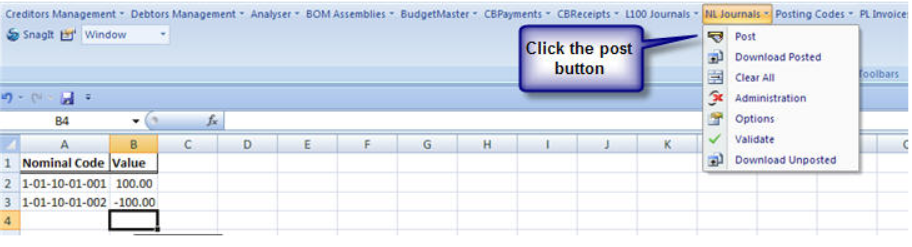
In order to post the journal to Sage, select Excelerator > Post NL Journal.
The template can be amended if necessary. Additional ranges can be added in the empty columns, and existing ones can be deleted.
To delete a range, access the Admin window, select the range and click Delete.
To add another range in its place, select the range and click Add.
Note, When designing for Multi-sheet Excelerator, the range name is linked to the sheet name. Problems can occur if user change the name of the sheet after design. See Troubleshooting Designing Templates for a fix.